Your system can be setup to allow bill auditing. This feature (when active) will require that bills be audited before they can be exported. This helps to avoid the need for re-bills or supplemental billings caused by bills being exported before corrections are made.
Click Tools, Bill Auditing to mark the invoice as audited (or to clear the audited flag)
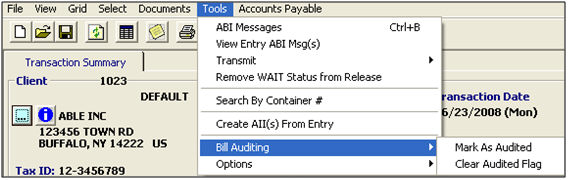
Once you have successfully audited this billing, a note will display in the transaction as Audited on (date/time) by (user)
The accounts payable menu on the transaction screen is used to attach payables to a transaction prior to the creation of the bill. Once you have saved the bill, you cannot use this accounts payable button, and all changes from that point must be made within the bill.
Click the Accounts Payable menu option to add a payable to the current transaction

This opens a new Accounts Payable screen, which is processed the same way as a new fee when you are in the billing screen.
When you create the bill for this transaction, these fees created using the Accounts Payable menu will automatically carry over to the bill.
The system allows you to create “bill only” transactions from the transaction module. This procedure is used to create a bill which is not attached to a specific transaction.
Create a new transaction  with a transaction type “OTH”
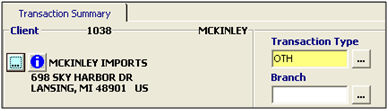
Then select a Client and a Bill-to and enter any reference/tracking information
You can then go into the billing screen  and create the bill.
E-billing is a feature that will automatically send bills to your clients, based on information that you can set in the client’s profile. These bills are sent once a week to the email specified in the profile. Please note that additional fees apply for the setup of this feature.
E-billing must first be activated on your account. We will need the following information:
CC/BCC Email address - an email address that will be CC/BCC on e-billing emails
Subject - the subject line of the e-billing emails
Start Date - The date you’d like your e-billing to begin
Reply To Name/Address - name and email address that your clients can reply to
This will show in the “From” portion of the email, so your clients can simply reply to the e-billing email directly.
Return Receipt - email address that will receive proof of delivery/return receipt from the e-billing emails. This email address will receive a return receipt when the recipient has received and opened the e-billing email.
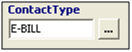
Click Profiles, open the desired profile, and click the Contacts/Carriers tab
Add the email recipient as a contact with contact type E-BILL
Click the Notes, Status, etc. tab and select Auto Email under invoice mode

If your e-billing is setup properly, the email address will show below the auto-email button
You can also select Include Copy of CF-7501 to include a 7501 with e-billing emails
Click File, Print
or the  button to
print the bill.
button to
print the bill.