
Click the Transactions link on the Main Page:
You’ll want to begin by getting familiar with the menu options on the transaction screen, the release/entry editor, and the line items screen. Once you’ve created your entry/delivery order/billing, you can perform actions within the entry/release editor or return to this transaction screen to print documents, as well as perform the transmissions/queries associated with the transaction.
|
Menu Option |
Description |
|
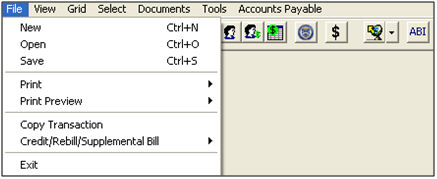
File - New |
Create a new transaction. |
|
File - Open |
Open a saved transaction. You can open the transaction by entry number or CNI number, or you can search the grid for the desired transaction. |
|
File - Save |
Save the current transaction. |
|
File - Print/Print Preview |
Print the documents associated with the current transaction. Click Print Preview to view this report on your screen. The available menu choices include transaction reports, 7501, 3461, billings, and file labels. |
|
File - Copy Transaction |
Copy the current transaction. You will be prompted to enter a new entry number and the information from this entry will be used to complete the new entry. |
|
File - Credit/Rebill/ Supplemental Bill |
Create a billing adjustment for the current entry/billing. Choose the type of adjustment that you’d like to make and a new transaction screen will open for this adjustment. |
|
File - Exit |
Close the current transaction, and exit the transaction module. |

|
Menu Option |
Description |
|
View - Reload |
Reload the current transaction. |
|
View - Notes |
View/Add transaction notes for the current transaction. The notes will display in the Notes screen, or click Insert to add a note to this transaction. |
|
View - Transaction Tree |
Open the transaction tree screen, where you can view related transactions. You can click Open to open a related transaction or click Notes to view/add transaction notes for the selected transaction. |
|
View - Central File Locations |
Open the central filing screen, where you can view file locations on this transaction and related transactions. |
|
Grid |
Open the Transaction Grid, where you can easily search for and access all transactions. |
|
Menu Option |
Description |
|
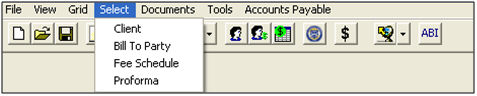
Select - Client |
Open the client pick-list, which will allow you to search for and select the client for this transaction. You can also do this by clicking the ellipsis in the client field. |
|
Select - Bill To Party |
Open the client pick-list, which will allow you to search for and select the bill-to party for this transaction. You can also do this by clicking the ellipsis in the bill to party field. |
|
Select - Fee Schedule |
Open the fee schedule pick-list, which will allow you to search for and select the fee schedule for this transaction. You can also do this by clicking the ellipsis in the fee schedule field. |
|
Select - Proforma |
Open the Select Proforma Invoice screen, where you can select a proforma invoice to be imported to/attached to this entry. These proforma invoices are created using the client-side application. |
|
Menu Option |
Description |
|
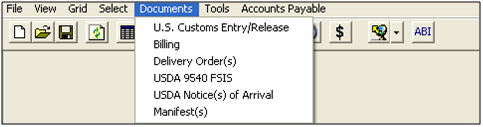
Documents - Entry/ Release |
Open the Release/Entry Editor screen, where you can enter all of the data to be transmitted for the customs release/entry. |
|
Documents - Billing |
Open the bill for this transaction. For more details on billings, please review the section of this manual on Billings. |
|
Documents - Delivery Order |
Open the Delivery Order screen, where you can add/view/print the delivery orders associated with this transaction. |
|
Documents - USDA 9540 FSIS |
Open the USDA 9540 screen, where you can add/view/print the 9540 forms associated with this transaction. |
|
Documents - USDA Notice of Arrival |
Open the USDA Notice of Arrival screen, where you can add/view/print the notices of arrival associated with this transaction. |
|
Documents - Manifests |
Open the Manifests screen, where you can add/view/print the manifests associated with this transaction. |
|
Menu Option |
Description |
|
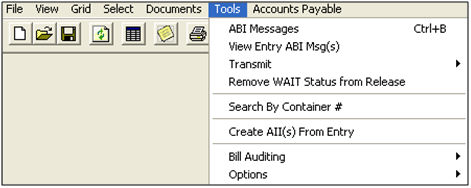
Tools - ABI Messages |
Open the main ABI message browser, where you can search/view ABI messages associated with all transactions. |
|
Tools - View Entry ABI Messages |
Open the ABI messages for this transaction. This will open an ABI message browser that contains only the messages associated with this transaction. |
|
Tools - Transmit |
Transmit the current transaction to customs. This option allows you to transmit the release as well as the entry. |
|
Tools - Remove WAIT Status from Release |
Remove the WAIT status from an entry. This tool is used when a transaction is stuck in wait status, which will prevent you from performing transmissions on the transaction. |
|
Tools - Select By Container # |
Open the Find Entry by Container Number screen, which will allow you to search for a previous entry by container number. |
|
Tools - Bill Auditing |
Use this tool to mark a transaction as audited. Authorized users will also be able to clear this audited flag on entries that have previously been marked as audited. |
|
Tools - Options |
This menu was used to switch back to the ”tabbed” entry interface. This option has been disabled for users, with the implementation of the mandatory use of the new entry interface. |
|
Accounts Payable |
Open the Accounts Payable Information screen, where you can add/view/manage accounts payable information associated with this transaction. |
|
Menu Option |
Description |
|
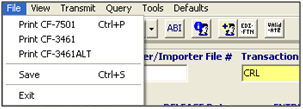
File - Print |
Print the documents associated with this release/entry. Clicking the print button will print the CF-7501. |
|
File - Save |
Save the current entry/release. You will be prompted to re-transmit if changes have been made to an entry that has already been transmitted to CBP. |
|
File - Exit |
Exit the Release/Entry editor, and return to the transaction screen without saving. |

|
Menu Option |
Description |
|
View - Release/Entry Notes |
Open the notes screen, where you can view the notes on this release/entry. You can also insert a new note to this release/entry from the notes screen. |
|
View - Client Info/Notes |
Open the client information screen, where you can view the notes for the selected client. |
|
Menu Option |
Description |
|
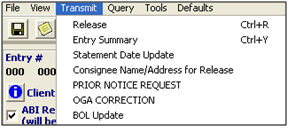
Transmit - Release |
Send the release transmission to CBP. This will certify your entry for release. Once accepted, this cannot be re-transmitted. Changes must be made through a bill of lading update. |
|
Transmit - Entry Summary |
Send the entry summary transmission to CBP. To send the release and entry summary together, you must check the ”Certify release from Entry Summary” checkbox. |
|
Transmit - Statement Date Update |
Send the statement date update transmission to CBP. This is used to change the statement date for the entry. This is also used to remove the entry from the current statement. If you want to change the statement date: - Make change to the statement date in the entry (making sure not to schedule past 10th day) - Save the entry with the changes - Transmit the Statement Date Update, using this menu option. |
|
Transmit - Consignee Name/Address for Release |
Send the consignee name and address information to CBP for release. This feature is intended for use on informal entries where the consignee tax ID is not available. |
|
Transmit - Prior Notice Request |
Send the prior notice request to the FDA for prior notice confirmation. If accepted, the PNC numbers will auto-fill into your entry. |
|
Transmit - OGA Correction |
Send the OGA correction transmission for this entry. This is used when the entry is accepted by CBP, but rejected by the OGA. This will send only the OGA portion of the entry, and can only be used if the entry is in OGA reject status. |
|
BOL Update |
Send the bill of lading update transmission to CBP. |
|
Menu Option |
Description |
|
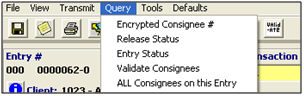
Query - Encrypted Consignee Number |
Query an encrypted consignee number for use on release transmissions. These encrypted consignees are not valid for entry summary transmissions. |
|
Query - Release Status |
Query the release status of the current entry. This feature can sometimes be used to import dropped ABI messages into the ABI messages for this entry. |
|
Query - Entry Status |
Query the entry status of the current entry. This feature can sometimes be used to import dropped ABI messages into the ABI messages for this entry. |
|
Query - Validate Consignees |
Query the consignee data with CBP. This transmission will tell you if the consignee name/address/tax ID are valid for use. |
|
Query - All Consignees on this Entry |
Send a batch importer/bond query on all consignees for this entry. This will return queries on each of the consignees on this entry. |
|
Menu Option |
Description |
|
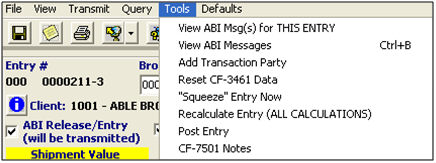
Tools - View ABI Msg(s) for THIS ENTRY |
Open the ABI messages for this transaction. This will open an ABI message browser that contains only the messages associated with this transaction. |
|
Tools - View ABI Messages |
Open the main ABI message browser, where you can search/view ABI messages associated with all transactions. |
|
Tools - Add Transaction Party |
Add a transaction party from within the entry. This will open the Add/Edit Transaction Party screen. See the profiles section of this manual for details on transaction parties. |
|
Tools - Reset CF-3461 Data |
Reset the CF-3461 data to reflect the current entry data. This will not transmit any data to CBP. |
|
Tools - "Squeeze" Entry Now |
Squeeze the current entry. The squeeze feature is used to consolidate lines containing identical product types (ex. same HTS, c/o, etc.) |
|
Tools - Recalculate Entry (All Calculations) |
Re-calculate the current entry. This will perform all of the functions, formulas, and calculations on this entry and should always be done after making changes that affect values, duty amounts, weights, etc. |
|
Tools - Post Entry |
Open the post entry screen. |
|
Tools - CF-7501 Notes |
Open the CF-7501 Notes screen, where you can enter free form text to be printed on the 7510. This will allow a free form text area of up to 4 lines, 70 characters per line. This will print above the first CBP line on the CF-7501. |

|
Menu Option |
Description |
|
Defaults - Entry Defaults |
Open the Line Item Defaults screen, where you can enter entry defaults to be used throughout the entry. |
|
Defaults - Invoice Headers |
Open the Invoice Headers screen, where you can enter invoice defaults to be used in the invoice information for this entry. |
|
Menu Option |
Description |
|
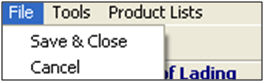
File - Save & Close |
Save the current line and close the line item screen. The system will validate your line at this time and may prevent you from saving based on this validation. |
|
File - Cancel |
Close the current line and return to the release/entry editor without saving. |
|
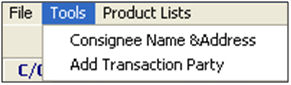
Tools - Consignee Name & Address |
Open the consignee name and address window, where you can enter the consignee name and address information at the line level. This is for release transmissions only. |
|
Tools - Add Transaction Party |
Open the Add/Edit Transaction Party window, where you can add/edit transaction parties for this client. See the Profiles section of this manual for details. |
|
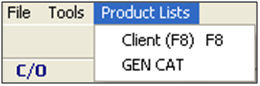
Product Lists - Client(F8) |
Choose a product from the client’s product list. Using this feature will clear any information that is currently entered into this line item. |
|
Product Lists - GEN CAT |
Choose a product from the general broker profile product list. Using this feature will clear any information that is currently entered into this line item. |
Now that you're familiar with the basics of the Transactions module, you're ready to begin Creating a Transaction.