
Once you’ve satisfied each of the eligibility requirements for RLF, the first step is to setup your ports for remote transmissions. This can be done by any user with administrative access.
Click the System Administration link on the Main Page:

Choose Add locations for entry/release transmissions and click Open Selected
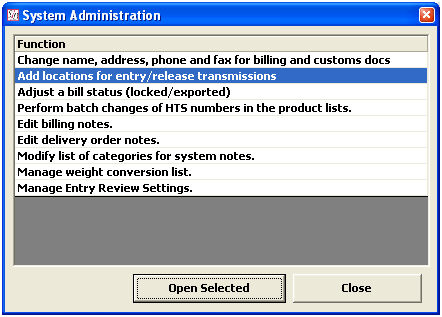
Click Add to add a new port, or Set/Reset RLF to edit an existing port in your listing
|
Field/Button |
Description |
|
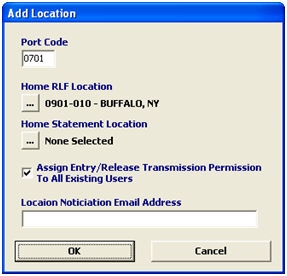
Port Code |
Enter the port code that you would like to add as an entry/release location. If you are editing an existing port, this will display the port code and port name for the selected location record. |
|
Home RLF Location |
Click the ellipsis to choose the home port location for RLF transmissions in this port. This will display the pick-list of all available ports that can be chosen as the home port for RLF transmissions. |
|
Home Statement Location |
Click the ellipsis to choose the home statement location for entries in this port. This will display the pick-list of all available ports that can be chosen as the home statement port. This cannot be used with RLF. |
|
Assign Permission to Existing Users |
Check this box to give all existing users permission to send release/entry transmissions for this new location. If this is not checked, users must be given permission individually through the broker profile. |
|
Location Notification Email Address |
Reserved for future use. |
|
OK/Cancel |
OK will save this location and return you to the locations screen. Cancel will cancel and return to the locations screen without saving. |
Now that you're all setup for Remote Location Filing, you can begin Creating RLF Entries.